If you have a polar scope - and can see Polaris or the Southern Pole, these steps are probably unnecessary.
Any improvements from the pros are always appreciated. Thanks in advance!
Please take note that the co-ordinates used here are for New Zealand. I chose these co-ordinates as it will exaggerate the adjustments and you can see how large magnetic declination can be for different locations. Singapore is in the Northern hemisphere and you will have to align to the North Pole. Its latitude and magnetic declination are so minute, it is almost close to the magnetic north pole and latitude of 1.29 degrees only. So the mount is going to look quite horizontal.
Equipment used:
1) Two apps in Samsung Galaxy Note II - see leftmost and right most
a. Calculate Magnetic Declination - UPDATE - thanks to Gary - this app has been renamed to Geomagnetic Field (Binary earth) in Google Play
b. Xclinometer

P1060269 by tuna7777, on Flickr
2) BackyardEOS on laptop/netbook to check for drift and acquisition of photos. Don’t really need it for acquiring the photos but more useful for checking drift.
3) Vixen Polarmeter – compass is most important.
Getting Rough Polar Alignment
1. Run the app and get the magnetic declination and latitude of your position using your smartphone GPS. For illustration, I am using co-ordinates for a NZ location.
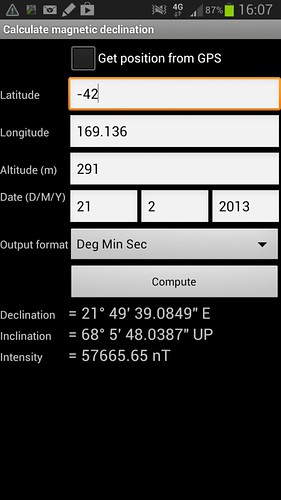
Screenshots_2013-02-21-16-08-00 by tuna7777, on Flickr
Here are the coordinates for my Singapore location.
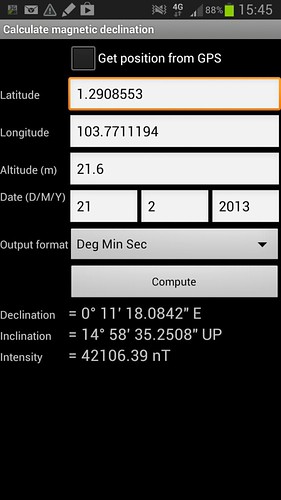
Screenshots_2013-02-21-15-45-58 by tuna7777, on Flickr
You can see the huge difference in magnetic declination. Declination in NZ is like 21.5 degrees and Singapore is less than a degrees. Both declination is East - which means that the True South or North as the case may be, is East of the corresponding magnetic South or North. If you see west in the declination, its just the opposite.
2. Set everything up on the tripod excluding the camera and scope.
3. Align the set up close to the North or South pole (in this example, I am using the NZ location which will be towards the South pole)
4. This is where I get kiasu: try and level everything:
a. Adjust the latitude scale on the manfrotto to ZERO.
b. Adjust the Vixen Polarmeter so that it reads zero on its latitude scale. There is a bubble level on the polarmeter too.
c. Level the Manfrotto mount using the tripod legs only. Don’t use the latitude knob on the manfrotto to level. Tripod has no bubble so I use the bubble on the manfrotto.
d. By this time, the latitude indicator on the Polarie should also be pointing to ZERO.
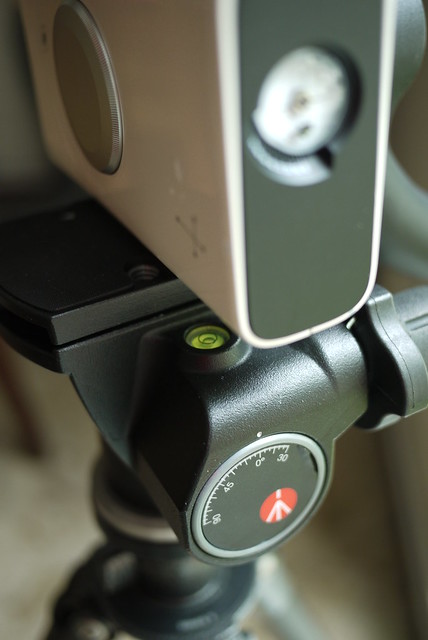
P1060267 by tuna7777, on Flickr
5. Compass direction. After you convince yourself everything is about as level as it can get, use the knob on the manfrotto to adjust the compass on the Polarmeter until you get to your desired magnetic declination. In this example, i am using the NZ location to show magnetic declination of 21.5 degrees east of the magnetic south pole. If it is Singapore, your compass will be pointing to North with very slight adjustment for declination.
Compass direction for New Zealand
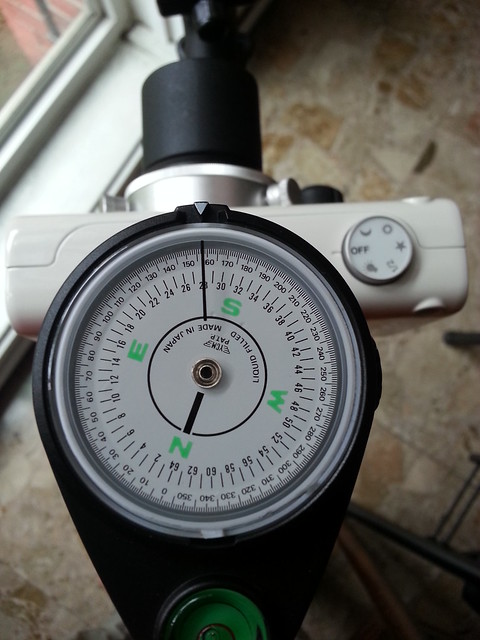
20130219_163054 by tuna7777, on Flickr
6. Adjusting for the latitude for your location. Do a rough adjustment using the latitude knob on the Manfrotto. Then I use my samsung note to get closer. This isnt the best idea but it utilises what I have. I use the Xclinometer App. Gingerly place it on top of the Polarmeter = yup. I cant find any where else flat to place it. BE WARNED – YOU CAN DROP YOUR PHONE EASILY IN THIS STEP. Mine did and looks terrible at the corners but still works. In this example, it shows a inclination of 42 degrees. If you are using for Singapore, it will be very horizontal and would be around 1.3 degrees.
Latitude adjustment for New Zealand
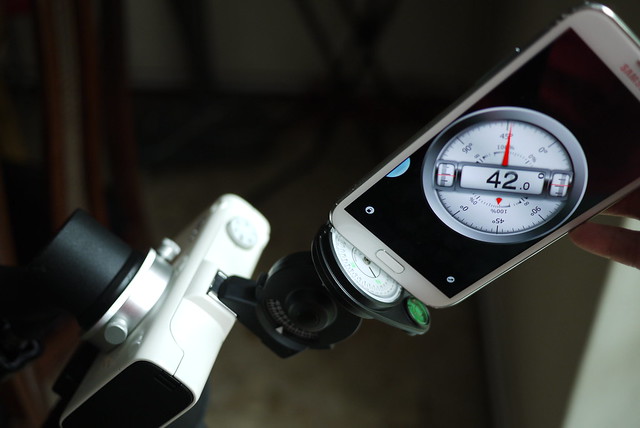
P1060272 by tuna7777, on Flickr
7. Adjust the Polarmeter back to being level with the ground ie its bubble should be level, and its latitude scale should point to your desired latitude. The reason for levelling the compass is that it will help you to micro adjust when you are doing drift alignment as it gives you a reference point.
8. By this time, the mount should be pointed in the rough direction of the Pole. It is best to do this when its daylight. Use a planetarium app on your smartphone to see if you are pointing in the general direction.
9. Mount your camera and scope to the setup. Attached the cables to your netbook and wait for sun down for the real test.
10. Drift Alignment with Backyard EOS.
When the sun goes down, the stars come out, I will locate a bright star and turn on Backyard EOS which is loaded onto my windows laptop. As far as I know, Backyard EOS works only with Canon cameras (please check the website as some legacy models may not be supported).
Previously I would have to morphed the Borg 45 into a telescope with diagonal and illuminated eyepiece with recticle to do drift alignment. However I found that swopping out the telescope and the camera/borg setup may upset the balance. Therefore I switched to using Backyard EOS running on the laptop with the Canon connected to the laptop. The software provides live view which helps with focusing and framing as well as acquiring images. It also has a PHD guiding function but the Polarie has no such port.
Backyard EOS's drift alignment function allows me to check the drift and direction of the star. There are moveable and tilt-able cross hairs to track the star drift. During an imaging session, you can check if alignment is still on. I no longer need to swop the camera out and put a scope back on. Its also less strenuous on the eyes as I am not constantly peering down the eyepiece.
Here is a screenshot of the drift alignment function.
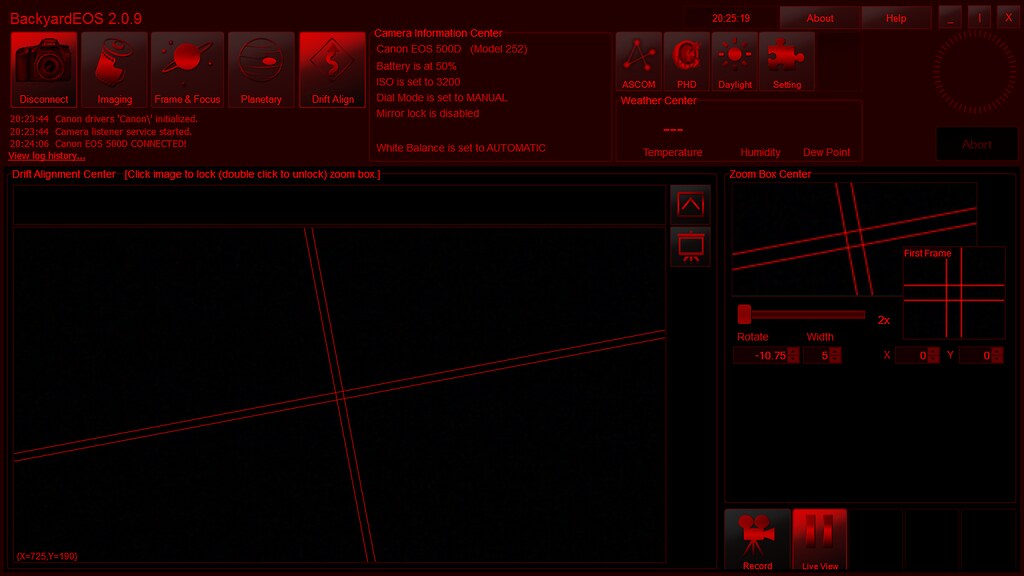
Backyard EOS screenshot by tuna7777, on Flickr
There are plenty of discussions on the web for drift alignment and I am no expert at this. However the short answer to what I do next is :
1) turn off the mount motor and watch the star drift. Backyard EOS allows you to zoom in so that you can see the drift faster in real time. Adjust the cross hairs eg tilt it until the East-WEst drift is aligned with one of the straight lines.
2) Once the cross hairs are aligned, switch the mount on, centre the star and watch for North South drift and make adjustments accordingly using the manfrotto knobs. Here is where the Polarmeter compass comes in handy as it allows you to check how much adjustment you made in either the east or west direction.
For the pictures that I took in NZ, I didnt do any further drift alignment. After taking the above steps, once I switched on Backyard EOS, the stars could stay still for 1 min without much trailing. My next goal is to really try and get like 3 min subs using this set up and drift alignment. Hope above helps!