
I'm not good at estimation, so always got problems to accurately point at object even when using Telrad or Rigel Quick Finder. Since I got a Telrad, I decided to replace the bullseye reticle to a grid reticle and to my surprise, it's very easy to do it.
The Telrad bullseye reticle can be remove very easily... may be too easy for my copy.
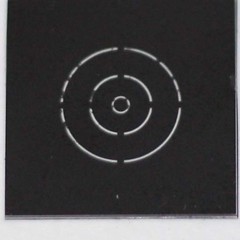
After the bullseye reticle had been remove, you'll see there is a translucent screen behind it. The screen is use to diffuse the red light source behind it and act as a constant circular red light source. Due to the size of this circular red light source, the maximum possible angular projection is limit to around 4 degree. Below are the original bullseye reticle measurements:
Size of reticle: 17mm x 17mm
Outer Circular Reticle (4 degree): 9mm
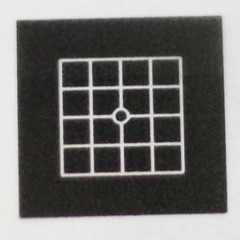
Base on the measurement, the scale use by the Telrad reticle is 2.25mm (9mm/4 degree) per degree. Using that scale, I made a grid base reticle using my computer and print on transparency.
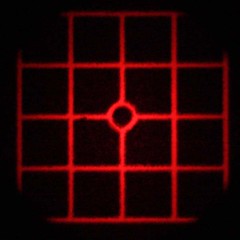
One issue is the "black" background my printer print is not totally opaque, so I paste 2 of them together using double sided tape to make the black more opaque. It's improve, but still can see some of the light on the background of the projected reticle when at maximum brightness.

I think this shouldn't be an issue (hope so) as I usually won't turn the brightness to maximum, so need to do some field test. Here is an image of the reticle at normal brightness and the photo of the reticle in the Telrad.
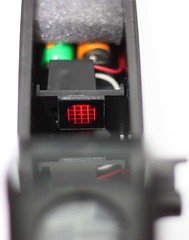
Anyway, I paste the reticle on the screen using normal glue and it seem to stick on the screen quite well... If it drop off, I'll use more "powerful" glue.
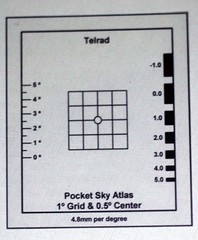
By the way, I also made a star hop grid reticle template for Pocket Sky Atlas.
Hope this new reticle can help me point at object easily without using my optical finder.
Have a nice day.

